
When we bought this house (pre-build) in January 2017, we started dreaming about our new backyard. I knew I didn’t want to do a huge interlock patio again, since we found that it included plenty of maintenance. The weeds that would grow within the grout and the shifting of bricks left us feeling frustrated. Not to mention it’s not the coziest of feelings to only have cement beneath your feet. Don’t get me wrong, I love interlock bricks and the purpose they serve, but was looking for something different in this new house. Something a little more cozy, more of an extension of our home. That’s how we came to choose a composite deck. It not only require little to no maintenance, but it also carried the same flooring look from inside to out.
Designing the Deck
With the sliding door at the back of our house being around 25 inches above grade, the first thing I had to decide was do I want steps as soon as we walk out the door, or do I want to work steps into the design of the deck elsewhere? Well, this was an easy answer for us. We wanted it to be as easy and seamless as possible to step out onto the first portion of our deck. This is where we would be putting the bbq so the ease of popping in and out of the door quickly while cooking dinner was important to me. Also, with young kids at home, it felt safe that there wasn’t stairs as soon as the door was opened.
Once that decision was made, it was time to deliberate the plans for the entire backyard reno. Some things to consider when planning your backyard are:
- Main function. Will your backyard be used mainly for entertaining, or are you just planning to use it for bbq and family dinners? Do you want space for the kids to play or are do you want a more grown up space? Or, are you hoping to achieve all of the above?
- Space: Just because we want to have it all, doesn’t mean we can. Sometimes the space is limited, so we need to prioritize what is most important to us. Another space issue is the shape of your outdoor space. It’s best to let your existing space shine when you’re planning your backyard. You know…can’t fit a square block into a circle hole!
- Flow: Once your oasis is complete, it would suck to constantly be bumping into things or having to take the long way around all because the flow of traffic doesn’t work. Think of how you would like to move around in your backyard, what spaces will you be moving between and how do you want that to feel.
- Drainage: Yes, I know it’s not the sexiest part of planning your oasis, but you want to make sure that when there’s heavy rainfall, melting snow in the spring or emptying out the kids inflatable pool 2000x in the summer that the water drains from your space properly and doesn’t leave you with muddy puddles. Peppa Pig and mosquitos may like those but homeowners…not so much.
- Materials: Every landscaping material has it’s pros and cons. That is a whole blog post of it’s own. The main things it’s comes down to are cost, function, upkeep/maintenance, and durability. The overall look also, but that is kind of obvious, right?
Tip: When planning the dimensions of your deck, make the deck frame 1.5 inches shorter and 3 inches less wide than you want the final deck to be. This will leave room for your deck boards to hang over the edge by 1.5 inches so there’s room for installing fascia and still leaving a 1/2 inch hangover which looks professional and leaves a cleaner finish.
For us, this wasn’t too difficult to decide because like I said before, we began dreaming about our backyard oasis as soon as we purchased the house, which was now almost 3.5 years before. With the main details decided (size, layout, materials), we got to work on what we would start calling the Landing Deck or the BBQ deck.

Rough draft of Deck Design
Step 1 – Posts
Ideal deck post spacing is 8 feet or less. It is best to check with your city’s building code about Deck Post spacing allowances. With the BBQ deck being 6×12′, we decided to have 3 posts that were 5 feet away from the Ledger Board, leaving a 1 foot cantilever at the front of the deck. A cantilever is when the joists hang over the end of the beam. The posts were set in 1 foot from where the edge of the deck would be. (Truth be told, while planning out the amount of posts we would need I totally forgot to take the Ledger into consideration and ended up digging and setting 3 extra posts. Oops!) Once we had laid out were we wanted the posts to be, we hired someone with a bobcat to come dig the 4 foot deep holes for us for around $15 per hole. This saved us the back breaking work of digging a hole that deep by hand or spending almost as much to rent a hand held auger and still having to do the work ourselves. Once the holes are dug, sonotubes are placed in each hole along with the pressure treated posts. We then mixed the cement, poured it around each post, and used a long stick to “stir” the cement inside the sonotubes to allow any air bubbles to rise. The posts were levelled and plumed and left to set in the cement for a couple of days. Tip: Where possible, try to plan setting your posts in place around the weather. It is best if they stay dry for at least 24 hours, but even better for 48 hours. ALSO…Leave your posts taller/higher than you will need. After your ledger board is installed you can measure it out and cut them down exactly to size (see step 3).

Sonotubes for footings
Step 2 – Ledger Board
Where possible, it’s always a good idea to anchor a deck to the house, especially decks that are higher than 24″ from the ground. Ours was going to be just under this height, but because there would be some heavy items constantly sitting on it we felt it was a good idea to put in a ledger board.
To do this we pre-drilled holes through the 2×8 pressure treated ledger board and through the brick and rim joist, straight into the basement. We then put ‘through bolts‘ through these openings, applying some outdoor silicone caulking behind the head of the bolt and secured them with nuts in the basement. There are several ways to attach a ledger, but because our basement is unfinished and we could access the rim joist, we decided this was the strongest option. Tip: Apply caulking to the bolt to help avoid any water from seeping through the hole. No one wants water getting into their house!
We wanted the deck to sit just under the door sil, so we made sure to place the ledger board 1” below, which would allow the composite boards to slide right between the ledger and the sil. Tip: Be sure to measure your deck boards, since they all vary slightly and don’t always match up with the dimensions the manufacturer gives.
Step 3 – Cutting Down and Levelling the Deck Posts
Now that the ledger board and posts are installed, it’s time to cut down the posts to the height you need for the beam to sit on top of. To do that, we held one side of a joist board up against the ledger and the other against a post and placed a level on top of it. Once the joist was level, I used a pencil to mark where the bottom of the joist hit the post. Next I used a scrap piece of joist to mark down to where the beam would sit. From there I used a beam board to mark a level line across all 3 posts. Once all the markings were made I used a Hacksaw to cut the posts to their needed height.

Ledger Attached and Beam in place
Step 4 – Installing the Deck Beam
Each post had this post cap or saddle attached to the top of it using deck screws. Once all 3 were in place, two 2×8 pieces of lumber were sandwiched together using deck screws every 12 inches on each side, then placed inside of the post caps and attached using these deck screws.
Step 5 – Hanging the Deck Joists and Attaching Rim Joist
First thing to do is buy these joist hangers (sizes vary depending on the size of your joists. In this case we were using 2×8 joists). You can either use 10d common nails or 2.5 inch Strong Drive SD Screws to install joist hangers. If using nails, I highly suggest you invest in a palm nailer like this one. You will be very happy with your purchase when you don’t swing and miss the nail (and get your thumb) or fight to find a way to fit your hammer into the tight spaces between joists.
First I took a measuring tape and marked out where each joist should go. I wanted to make this first part of the deck extra strong because the BBQ and Privacy Fence would be sitting on it and they are pretty heavy. This is why I decided to go with 12″ spacing instead of 16″. Once I knew where they were all going, we did 1 joist at a time until they were all attached to the ledger board and resting on the beam.
Next up was squaring the frame so I could mark where the joists needed to be cut. To do this, I used the 3/4/5 rule. I measured 3 feet from one edge of the ledger in and made a mark. Then I measured and marked 4 feet from the ledger into the end joists. Next, I had my husband hold the measuring tape on the mark I made on the ledger board, and I held the other end on the mark on the joist. I adjusted the joist until the mark was lined up with 5 feet on the measuring tape. Once it was, I placed a screw on an angle through the end joist, into the beam to hold it in place. We repeated that on the other end of the ledger board and end joist. Once the two sides were squared off I was able to mark a straight line across all the joists and use my circular saw to cut them all to size.
Now that the joists are all the correct size we simply held up the rim joist and attached it using the same deck screws. We repeated the process of attaching joist hangers to the joists and rim joist until all were secure.

Deck Joist Squared and ready for Rim Joist

Rim Joist and all Joists Installed
Step 6 – Installing Blocking
You want to install blocking between your joists at least every 4-6 feet. Because our deck was only 6 feet deep, this meant that we only needed 1 row of blocking. We also added 2×4 blocking laid flat on top of the beam between the joists. Tip: Adding blocking reduces or altogether prevents bounce in the deck and adds strength to long joist spans. It also prevents joists from moving or twisting as the wood contracts and expands seasonally. Blocking usually is done with the same material as your joists. Blocking should be staggered by an inch or two to allow you to attach it with a deck screw from the opposite side of the joist.
If you plan to do a picture frame border with your deck boards, you will have to do additional blocking along the two sides of the deck frame. To do this, we installed blocking every 12 inches between the first two joists on either side. Make sure to install this blocking 1.5 inches lower than the top of your joists. Once all the blocking is in you can lay a 2×6 on top of the and secure it using deck screws into every other piece of blocking. This will now give you something to attach your picture frame border to, as well as the ends of each deck board.

Picture Frame Border Blocking
Step 7 – Installing the Composite Deck Boards
This is the step where you will be very happy that you took the time to make sure your deck frame was squared up. If you skipped that step, you are going to spend many hours calculating tiny angles and trying to get all your boards to fit into place. The first boards that we attached were the picture frame border boards. To install these I had to cut the ends at a 45 degree angle so they would line up nicely with each other. Tip: Doing a picture frame boarder looks nice because it hides the ugly side view of the composite boards. If using Cedar or Pressure Treated deck boards a picture frame boarder still looks beautiful but so does a squared off one.
We used Trex Clam Shell Composite Deck Boards and used colour match screws to secure them in place. Screws should be place approximately every 12 inches. Once the border pieces are all installed, it’s time to move onto the inner pieces. To install these we used the Trex Hidden Fastener System.
The hidden fastener system evenly spaces out the deck boards so there’s no measuring and worrying on your part. Simply place one on each joist between each board and secure them in place using the drill bit that is included in the package.
Step 8 – Installing Fascia
Mostly all composite deck boards have coordinating fascia (A piece that you attach to the rim joist so the deck frame is hidden). I personally do not like the fascia they make because it is at most 12″ tall and is very expensive. To save money and to cover the entire opening below the deck we used the cut offs from our deck boards, which we then cut to size and installed vertically so they covered the entire opening under the deck.

Vertical Off Cuts “Fascia”
Step 9 – Expanding and Adding the Large Addition to the Deck
All the steps for the large portion of the deck were the same as for the same deck, just on a larger scale and with a few variations. Here are the main differences in the process:
- We use 2×6 lumber so the deck was as low to the ground as possible.
- We used Carport Saddles directly into the cement footings instead of using wood posts, again so it would be as low as possible.
- We worked in sections, breaking the deck down into 4 square or rectangular sections, and doing each section one step at a time. So we would do step 1 on section 1, when that was complete we moved on to step 1 in section 2, and so on. This not only allowed us to simplify the process and not miss any important steps, but it also make it less overwhelming.
- For the largest section, we installed only 3 sides of the picture frame boarder, then all the inner boarders. Once those were all in place we used a long 2×4 to create a guide for the circular saw and cut all the inner boards together at once. This saved us from measuring and cutting each 16 foot board individually (Those boards are damn heavy!!)


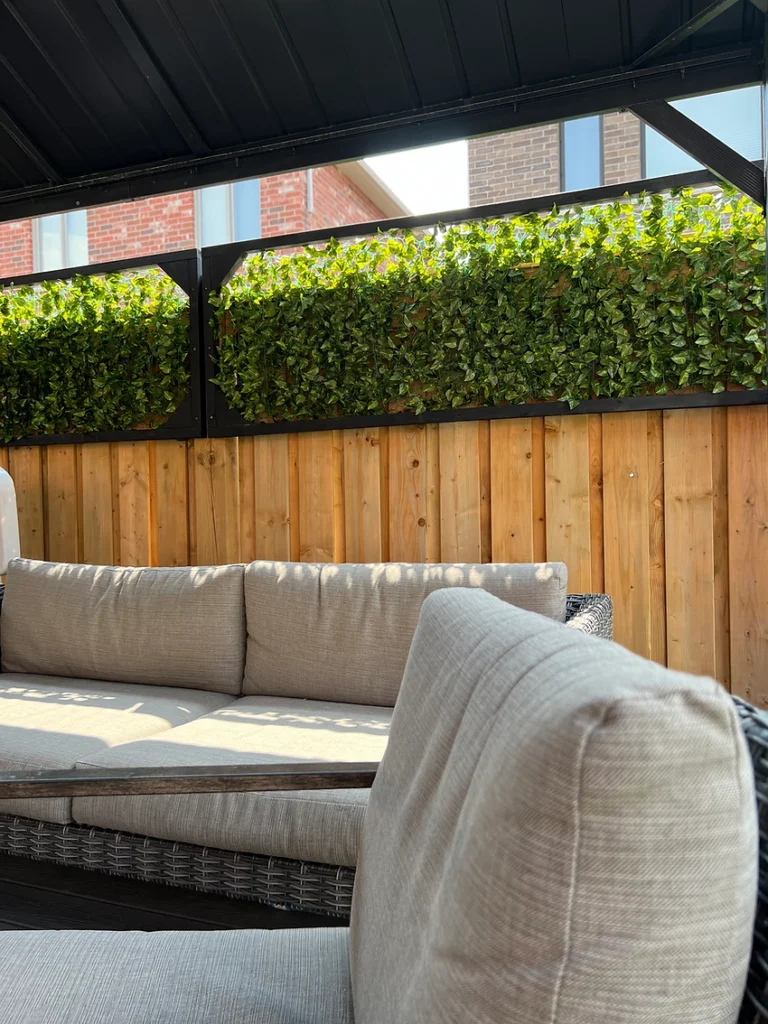
Step 10 – Enjoy your new Deck!!!
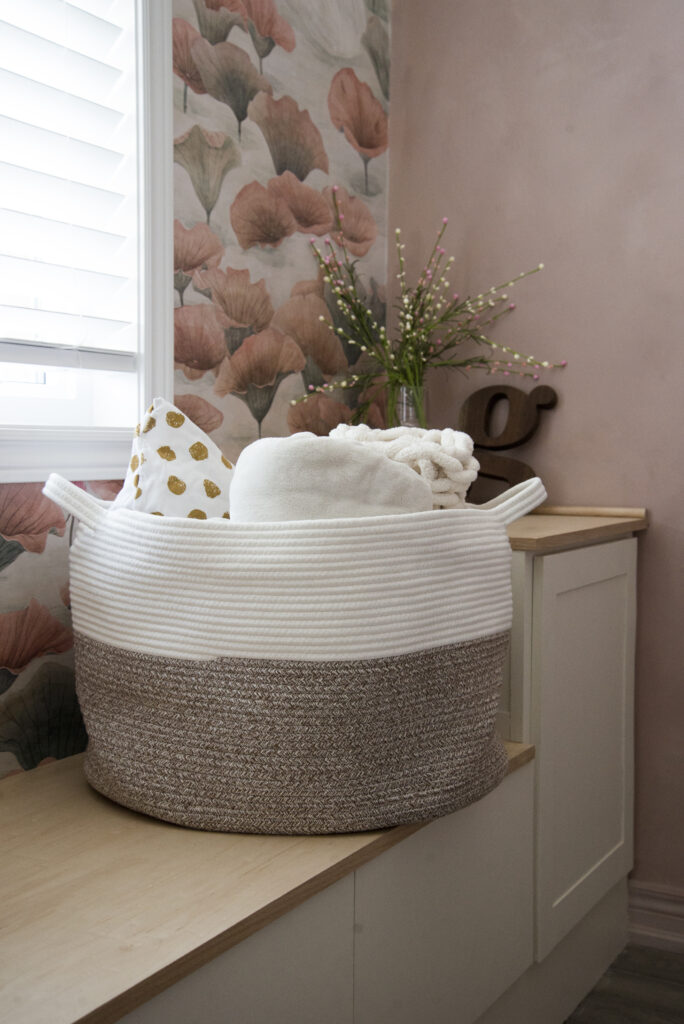
You’ve put in lots of hard work to get your deck done, you deserve to kick back and enjoy it as much as possible! If you need some tips for decorating your outdoor space and making it feel cozier, head on over to this blog post I did with all the details and links to my favourite products!


Building a Deck is no small feat, but breaking it off 1 piece at a time makes it totally doable for those who really want a great outdoor space but can’t afford to hire the job out. You should always consult your local building code before completing a DIY deck.
Follow me on Instagram for more tips and projects while we upgrade our new build house into a cozy home. To never miss out on a blog post, scroll on down and subscribe to my page! Feel free to also visit my Etsy page to find some instant download photography wall art.
Until next time,
Oli