
This article contains affiliate links. What does that mean? If you click a product and purchase it, I’ll receive a small commission from it at no additional cost to you. I only link products I love and use and think you will love too!
When we purchased this 42 year old home, we knew that the first project we needed to tackle was making the ONLY full bathroom in the house more functional for our family of 5. Currently, the bathroom has a tub/shower, toilet, and a single vanity. We definitely need an additional sink and more counter space and storage space, and I knew from the second I walked in there that it was totally possible to do, it just required a bit of construction and a lot of vision!
This is what the bathroom looked like when we bought it:
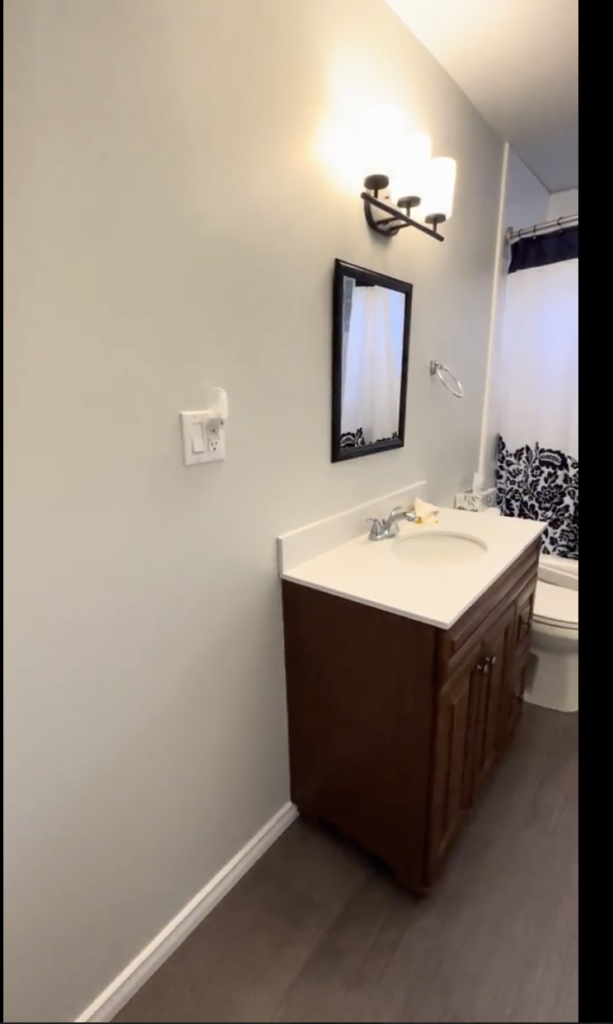
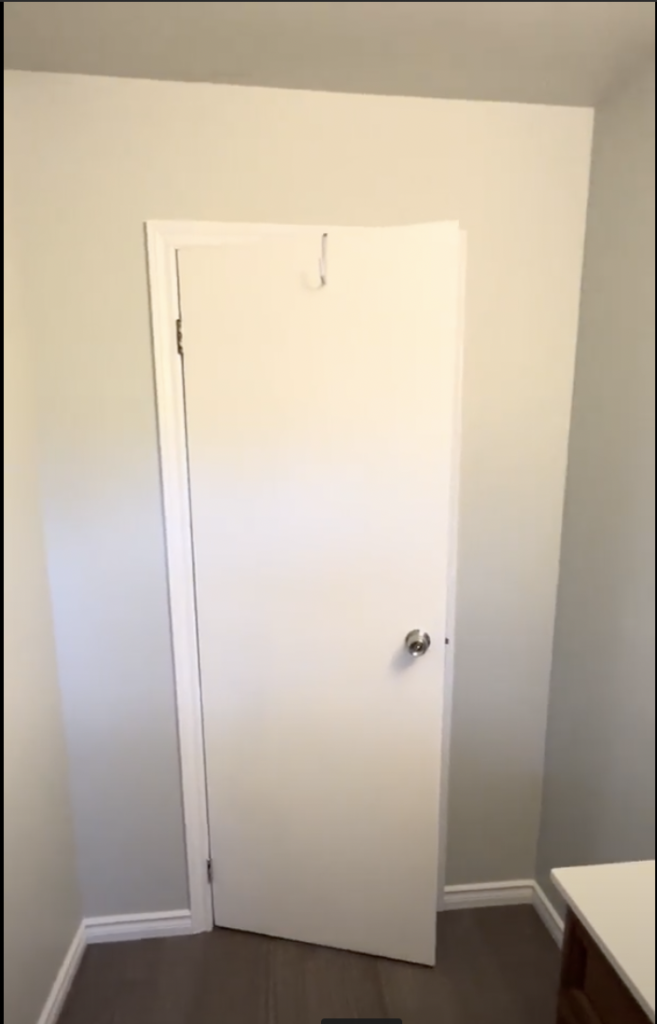
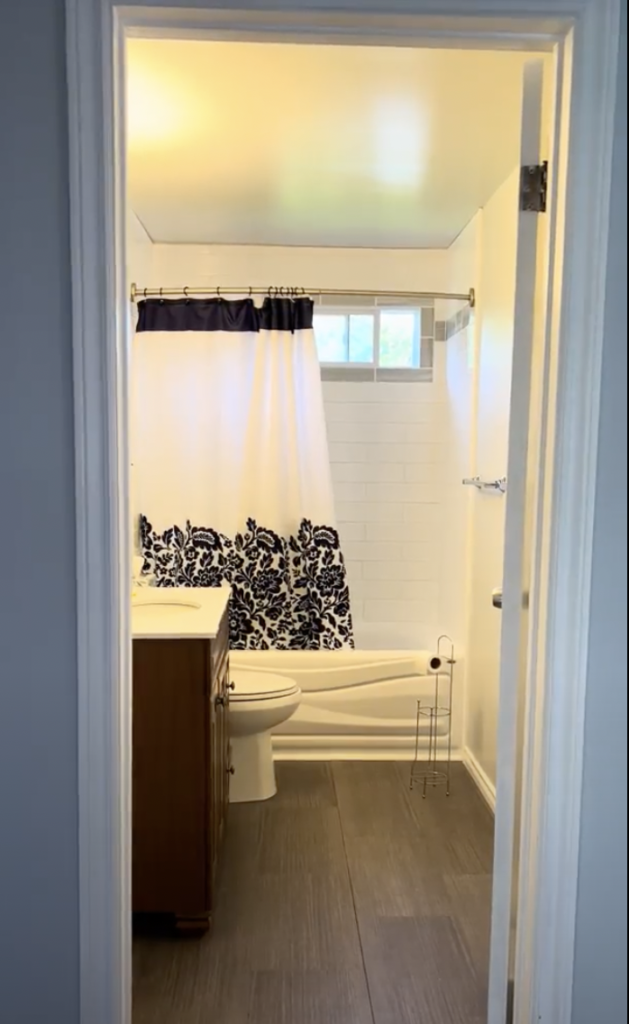
See all that space to the left of the vanity? I knew that was more than enough space to add an additional sink…but that door was going to be a problem. Cue me closing the bathroom door from the inside and seeing that there was at least an extra foot of space of the other side of the door as well. Next up I checked any visible electrical and came to the conclusion that I could most definitely move the door over, leaving space for a double vanity on the other wall!
Bathroom Renovation – Construction Plan
In the rest of the house I am putting a coat of primer on every wall, ceiling, baseboard and door trim. Since I needed to remove the drywall behind the vanity wall in order to change the plumbing (more on that later) and the drywall around the door in order to move it over, I decided to just rip all the drywall out. It was only 1 extra wall. Start fresh with new walls that nobody else’s naked bodies have ever possibly touched.
Once the drywall is out I will need to:
- re-frame and move the door over 9 inches
- have a plumber come to extend the drain for a second sink, and install the rough-in for wall mount sink faucets above the vanity, as well as install our new toilets (if I didn’t want to keep the bathroom drywall, you know I’m not keeping the used toilets!)
- have an electrician wire for sconces, ceiling pot lights and a ceiling fan, and re-locate the light switches for the room
- re-install drywall
The projects I have planned for the finishes in the room are:
- Building a double vanity out of Walnut lumber
- Installing large format floor tile
- source vanity countertops (porcelain or quartz? not sure yet!)
- build a secret wall cabinet for extra storage
- install floating, backlit mirrors for accent lighting
- apply micro-cement to the walls
The Design Plan
I’m going for a moody Mediterranean vibe in here, one that isn’t overly feminine and that will be suitable for my two boys to exclusively share eventually (I told you we had plans for this house!) This means I need finishes that are durable and organic. Think stones, solid wood and plenty of storage. Here is the first mood board I created for this room. Things are bound to change slightly, but certain things are a guaranteed part of the plan, like these sconces and mirrors that I already bought!

I LOVE these sconces. Hands down I needed to have them when I saw their design & price.
These faucets spin upwards so you can rinse your mouth without needing to do acrobats getting underneath it!
Two 24×36 inch mirrors are going to help the bathroom look even bigger.
A flat sided toilet was non-negotiable with 3 boys living here! The one I got is out of stock now but this is so similar.
I haven’t purchase the cabinet hardware yet, but I’m eyeing these ones.
I’m so excited for this room to be done. It’s the first renovation in a long list for this new house and it’s going to set the tone. Let’s hope it’s a good one!
To keep up with all the steps of this renovation be sure to follow me on Instagram and subscribe here to the blog so you don’t miss a thing!
Until next time,
Oli